There are 2 mechanics in this encounter that result in a wipe or instakill.
- “Firestorm” is the instakill mechanic when Fieser fills the sandforge with gas, then causes an explosion killing anyone in the sandforge. This can be avoided by being in the airlock as opposed to being inside the sandforge. You can interrupt the instakill by shooting his backpack.
- The Train Turret will result in a full wipe as it fires a mortar into the control room and destroys everything – identified by the wipe siren. This can be prevent by hitting the weapon inside the forge with 2 RPG’s
Before you can defeat Fieser you must;
- spawn the boss and fill the crucible with molten lava
- move the crucible to the train car & pour it over the turret
- destroy the weapon with water.
The 3 phases above must be completed while being mindful of the Train Car wipe mechanic and Fiesers instakill.
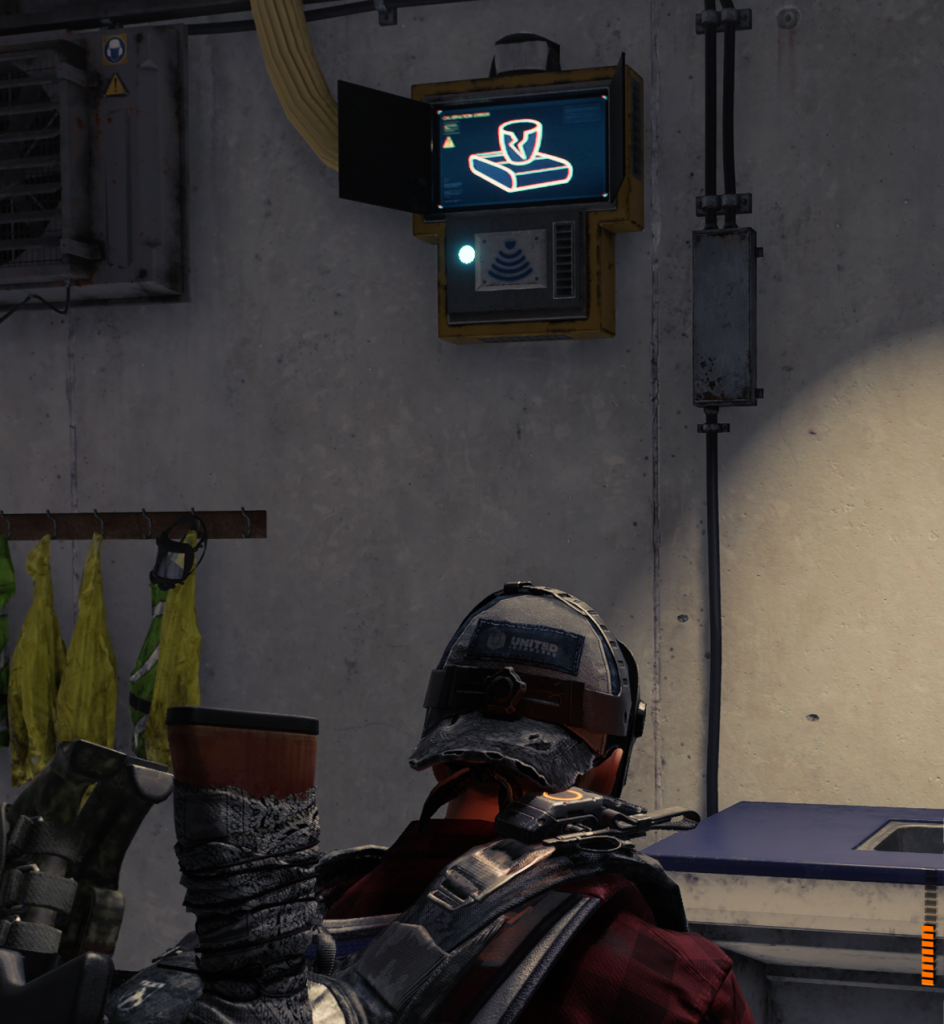
For the first phase, a code must be correctly identified from a screen inside the sandforge above door B. The code will only have 2 characters available. Eg. M # 2. An agent in control room will describe the symbol from the identified code. Agents around the outside of the sandforge must find the symbol on the ‘wifi’ box and shoot the attached red fuse box. This must be done once to activate the boss, and 4 further times to fill the crucible (5 correct codes in total)
Below is where you would see the code in the sandforge, and what the symbol on the ‘wifi’ box will look like

The code inside sandforge above Bravo The wi-fi box with the symbol

For the second phase, the Agent in the control room moves the crucible, and lets someone in the doorway to shoot the brakes. There are 3 brakes and can not be prepped before hand.
For the 3rd and final phase before fighting Fieser, water valves around the outside of the forge need activated to get water flowing to the 2 water cannons inside the sandforge. The water needs locked in by the control room between 80-85 water pressure. If the water pressure hits 99 it will reset. The water pressure can be found 3 at Alpha, 2 at Bravo and 2 at Charlie. They are made up of 15+25 and are random per encounter. When the water pressure is locked the gun must be destroyed by 1 or 2 agents using the water cannons inside the sandforge.
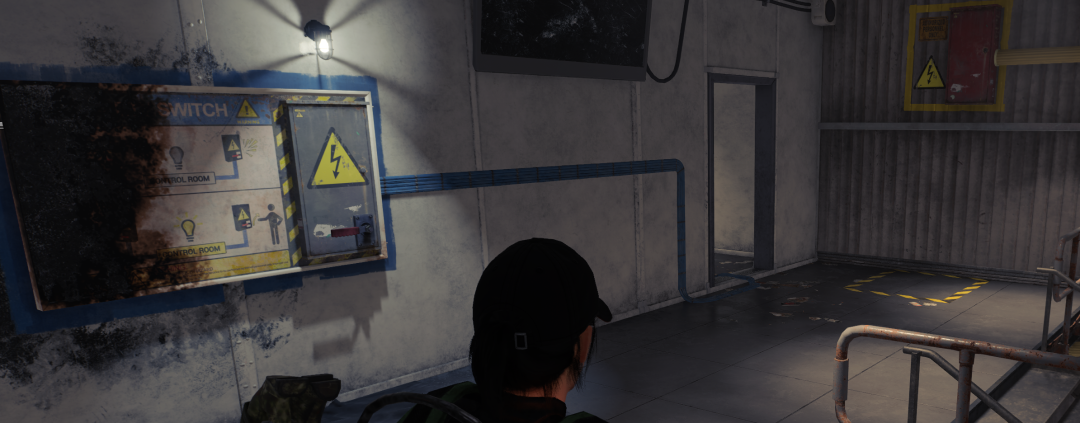
Inside the control room
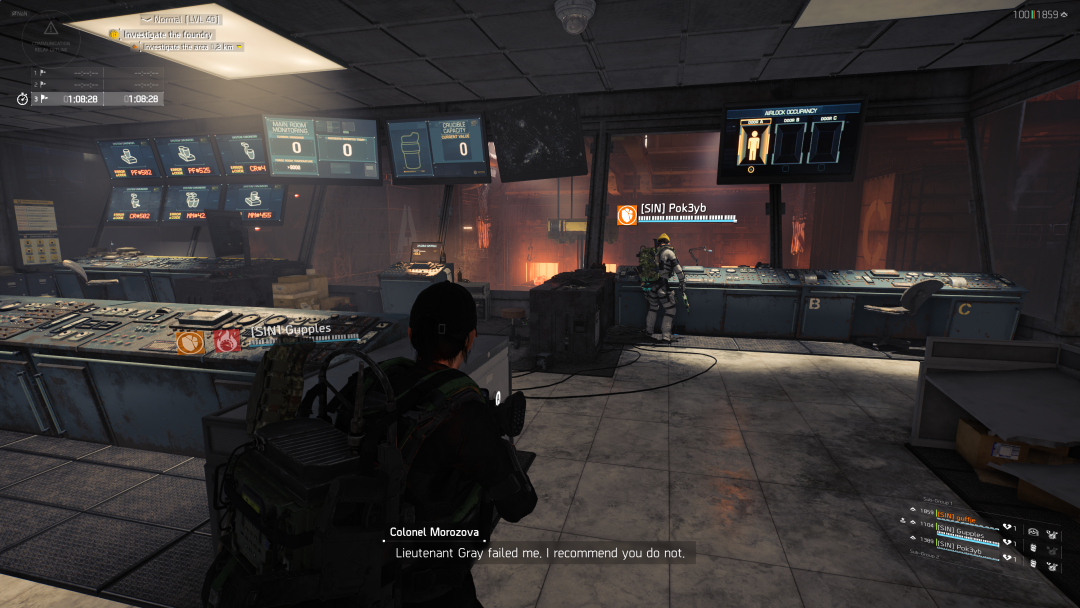
The image above shows inside the control room. The 6 symbol screens with codes are on the left. The computer to move the crucible is situated in the middle with the screen above telling you how much of the crucible is filled with molten steel. The levers for the airlocks are on the right labelled A, B, C. If you look at the screen above, it tells you when an agent is inside the airlock by lighting up.
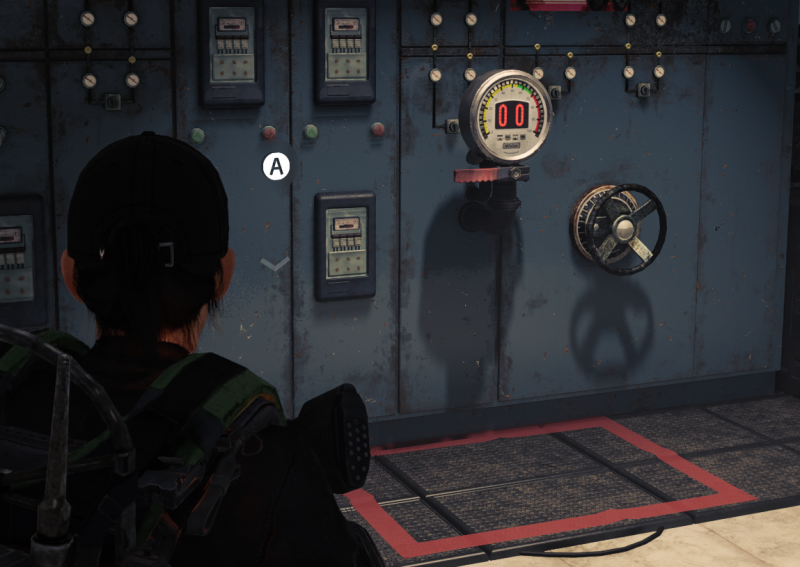
The control room is powered by electricity, and roughly every 45seconds a veteran and a heavy spawn on either side of the control room. The veteran rushes to break the electricity switch which results in nothing in the control room working. The electric can be turned on if players either side of the room flip an electric switch. The image below shows the electric switch on the left, and the red fuse box on the right.
When there is no aggro on Fieser inside the sandforge, his aggro turns to the agent in the control room. At this point he will break the glass which causes the control room to lockup meaning no agent can enter or leave, and will suffer from fire/carbon monoxide damage.
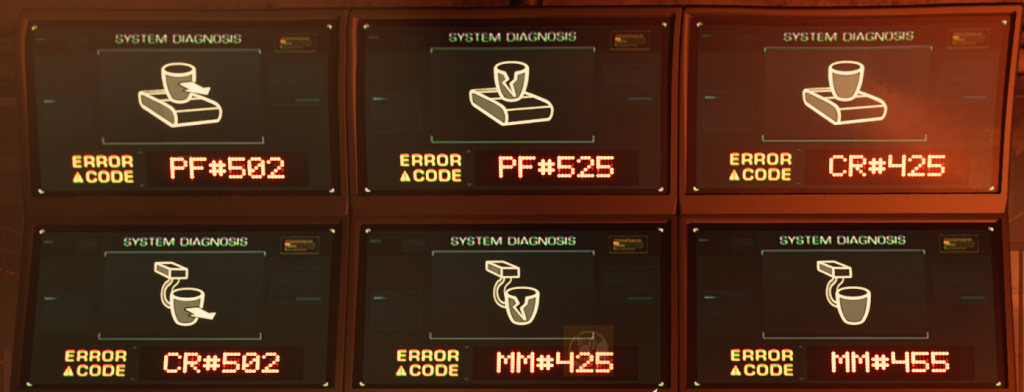
Inside the control room there are 6 screens with the following codes (the codes on the control room screens never change);
| Full codes seen in control room and corresponding screen | ||
| PF#502 | PF#525 | CR#425 |
| CR#502 | MM#425 | MM#455 |
| Codes seen in Sandforge and corresponding screen | ||
| F# 0 [1] | P # 5 [2] | C #4 [3] |
| R# 0 [4] | M # 2 [5] | #45 [6] |
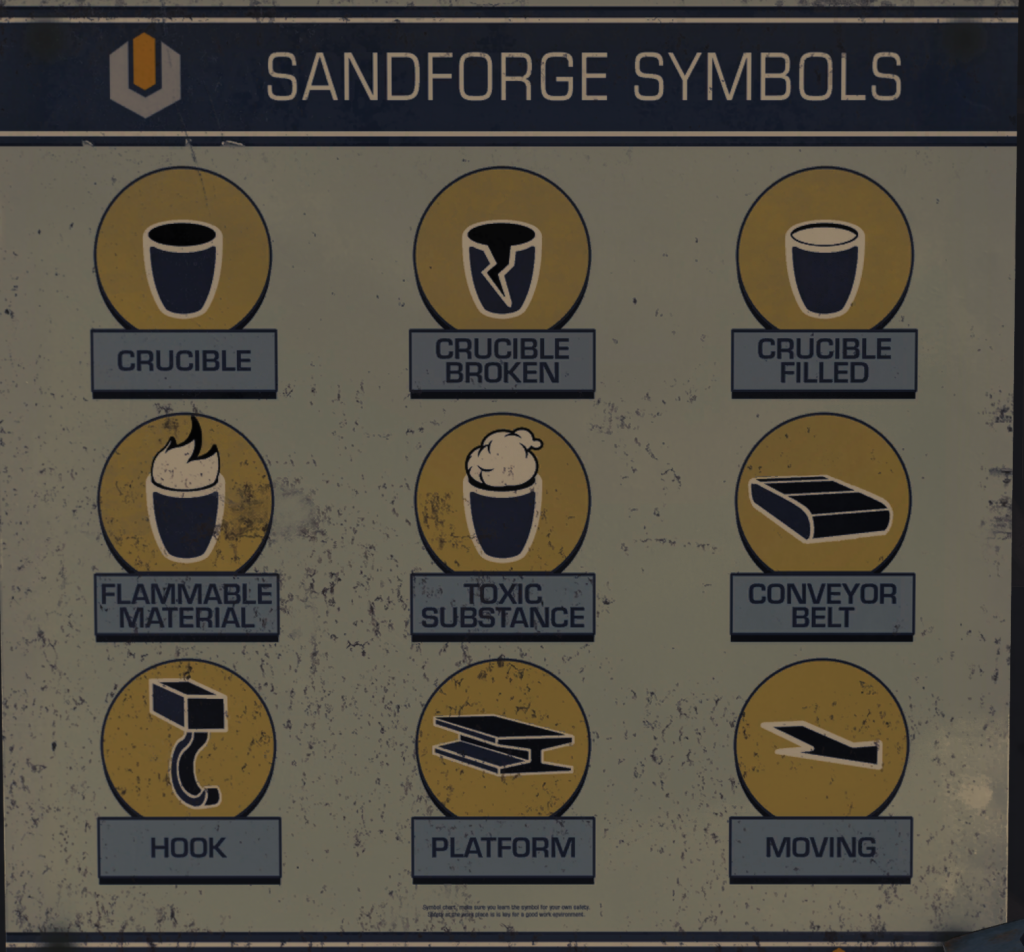
A code in the sandforge displaying ‘M # 2’ would be the bottom middle screen in the control room. Depending on the setup, the agent inside the forge can either tell the control room which monitor to look at, or give the letter to control room and let them check. Although there will be 2 monitors with P on it, P only relates to the top middle monitor. The same with Every other combination. The symbols in the photo below would be described something similar to;
- Empty cup on a conveyor with an arrow (top left)
- Broken cup on a conveyer (top middle)
- Empty cup on a conveyer (top right)
- Empty cup on a hook with an arrow (bottom left)
- Broken cup on a hook (bottom middle)
- Empty cup on a hook (bottom right)
IMPORTANT: The symbols change every time a red fuse is shot, requiring a new code to be identified inside the sandforge, and all wifi boxes checked for the new symbol as they refresh too.
There will always be a Crucible (or described cup) involved, therefore the call outs can be shortened to;
- Black belt arrow
- Broken belt
- Black belt
- Black hook arrow
- Broken hook
- Black hook
Other descriptions would be ‘double black belt’ and so on.
From the symbols below, the only ones that will never appear are; flammable material, toxic substance and platform.
When letting Agents into the sandforge, the Agent in the control room must hold the door open as it automatically closes when you let go of the lever. When you hold the lever, the door on the outside of the airlock closes, and the door into the sandforge opens.
To get the code, the Agent in the control room must hold open the airlock (A, B or C) to let an Agent in. This can be achieved by the Agent standing inside the airlock at A or C and looking at door B. When the screen is stated, the Agent in control room describes the symbol and can see if the correct symbol fuse box is shot by watching the crucible screen and seeing if it adds 25 % capacity.
When the crucible is at 100%, the middle computer in control room will light up – this will move the crucible when activated. After all 3 brakes have been destroyed, the Agent in the control room must ensure the the molten lava is tipped onto the train car weapon.
Valves must be activated around the sandforge aiming for no more than 90 water pressure. The Agent in the control room must ‘lock’ this in place between 80-85 to enable waterflow to the cannons inside the sandforge.